The Aprilaire 600 Installation Manual provides detailed guidance for installing, maintaining, and troubleshooting your humidifier. It covers essential steps, safety precautions, and compatibility checks to ensure optimal performance and longevity of the unit.
Overview of Aprilaire 600 Humidifier
The Aprilaire 600 is a whole-house humidifier designed to provide optimal indoor humidity levels, improving comfort and air quality. It is suitable for homes up to 4,000 square feet and features a bypass humidifier design, making it compatible with both heating and cooling systems. The unit is known for its quiet operation, efficient water usage, and low maintenance requirements. With its compact design, the Aprilaire 600 can be installed in various configurations, including on supply plenums or return air ducts. It works seamlessly with digital or manual controls, offering flexibility for different user preferences. The humidifier also includes a water panel evaporative assembly, which ensures effective moisture distribution. Its compatibility with hard water and optional water filter makes it adaptable to different water quality conditions. Overall, the Aprilaire 600 is a reliable and efficient solution for maintaining balanced humidity in residential environments, enhancing both comfort and indoor air quality year-round.
Importance of Proper Installation
Proper installation of the Aprilaire 600 humidifier is crucial for ensuring optimal performance, safety, and efficiency. Incorrect installation can lead to issues such as inadequate humidity control, water damage, or even electrical hazards. By following the installation manual, you can avoid common pitfalls and ensure the unit operates as intended. Proper installation also guarantees energy efficiency, reducing utility costs and extending the lifespan of the humidifier. Additionally, correct setup ensures minimal maintenance and prevents potential health risks associated with excessive moisture, such as mold growth. The Aprilaire 600 is designed to integrate seamlessly with your HVAC system, but this requires precise installation steps. Ignoring the guidelines may void the warranty or lead to premature wear of components. Therefore, adhering to the installation instructions is essential for achieving reliable operation and maximizing the benefits of your humidifier.
Pre-Installation Checklist
Before installing the Aprilaire 600 humidifier, ensure you have completed the following steps. First, verify that the unit is compatible with your HVAC system and water supply. Check the water hardness and adjust settings accordingly. Gather all necessary tools and materials, including the installation template, mounting hardware, and water supply components. Ensure the installation location is accessible and allows proper drainage. Review local plumbing and electrical codes to comply with regulations. Turn off the water supply and power to the HVAC system before starting. Familiarize yourself with the installation manual and safety guidelines to avoid potential hazards. Ensure the humidifier control is set correctly for your model, using Setting C for the 600 Series. Lastly, confirm that all components, such as the water panel and distribution tray, are included and undamaged. Completing this checklist ensures a smooth and successful installation process.

Preparation and Planning
Understanding the Aprilaire 600 system and space requirements is crucial. Plan the installation location, ensuring access to water supply and drainage. Verify compatibility with your HVAC system and adjust settings as needed for optimal performance.
Compatibility Check for Aprilaire 600
Before installing the Aprilaire 600, ensure it is compatible with your HVAC system. Check the system’s voltage, capacity, and airflow requirements. Verify that the humidifier can be integrated with your existing thermostat or control systems. Ensure the water supply line and drain are accessible and suitable for the unit’s specifications. Confirm the ductwork dimensions and layout to accommodate the humidifier’s installation. Additionally, verify the unit’s compatibility with hard water conditions if applicable. Proper compatibility ensures efficient operation and prevents potential issues during installation or use. Always refer to the Aprilaire 600 Installation Manual for specific guidelines and recommendations.
Tools and Materials Required
To install the Aprilaire 600, you will need specific tools and materials. Essential tools include a drill, screwdrivers (Phillips and flathead), adjustable wrench, pliers, and a utility knife. For materials, ensure you have copper tubing (if required for water supply), PEX tubing, electrical connectors, and mounting screws. Additionally, a saddle valve for water supply installation and a drain line kit may be necessary. Refer to the Aprilaire 600 Installation Manual for exact specifications. Having all tools and materials ready beforehand ensures a smooth installation process. Proper preparation prevents delays and ensures compatibility with your HVAC system. Always follow safety guidelines when handling electrical and plumbing components. This section focuses solely on the tools and materials needed, avoiding details covered in other sections like compatibility or step-by-step instructions. Gather everything listed to proceed efficiently with the installation.
Understanding the Installation Template
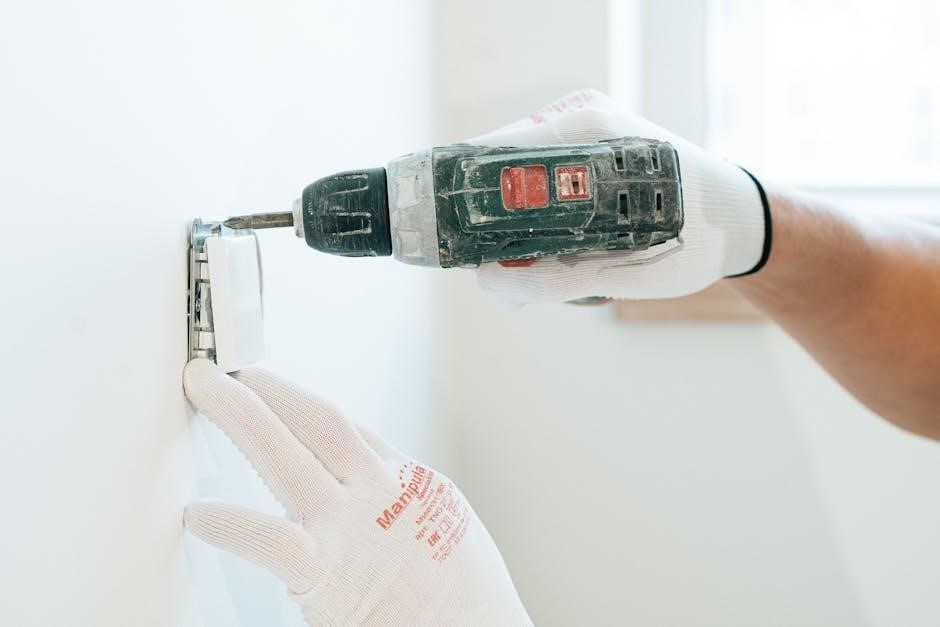
The Aprilaire 600 Installation Template is a crucial tool provided in the manual to guide accurate and efficient installation. This template helps in marking the correct mounting holes and alignment points on the wall or surface where the humidifier will be installed. It ensures that the unit fits perfectly, preventing any installation errors or misalignment. The template is specifically designed for the Aprilaire 600 model, so it aligns with the unit’s dimensions and mounting requirements. Before drilling or securing the humidifier, place the template on the surface and use it to mark the holes and key areas. This step is essential for maintaining the structural integrity of the installation and ensuring proper functionality. By following the template, you can avoid costly mistakes and ensure the humidifier operates efficiently. Always refer to the template provided in the manual for precise measurements and guidelines. This section focuses solely on understanding and using the template, avoiding details about other installation steps. Proper use of the template guarantees a secure and accurate installation of the Aprilaire 600.

Installation Process
The Aprilaire 600 Installation Manual provides a step-by-step guide for mounting, connecting water supply, and setting up electrical components. Follow the template and instructions carefully to ensure proper installation and optimal performance.
Step-by-Step Mounting Instructions
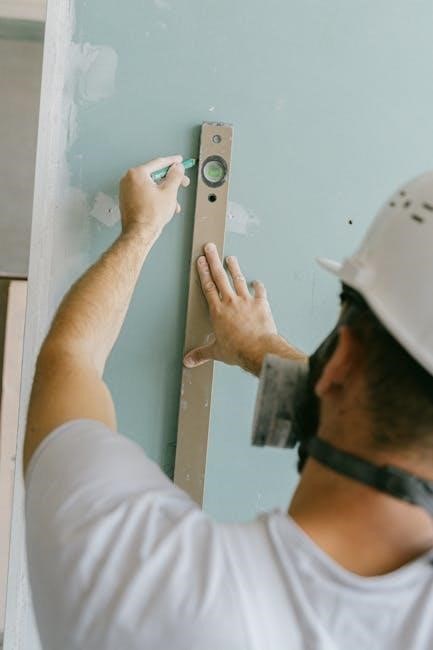
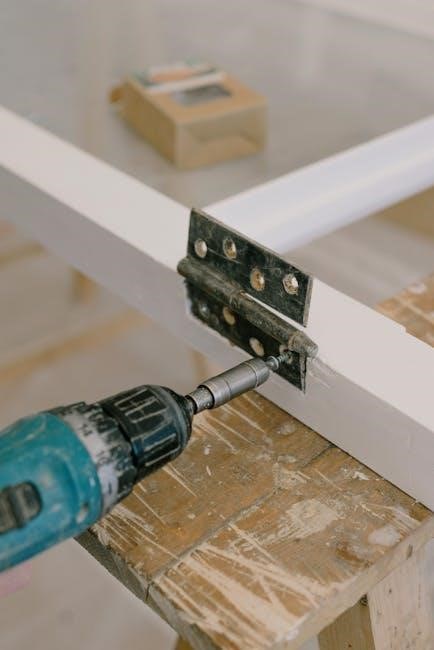
Begin by locating a suitable installation area, ensuring it is level and near the furnace. Use the provided installation template to mark the mounting holes accurately. Carefully drill pilot holes to avoid damaging the surrounding surface. Secure the mounting bracket using the supplied screws, ensuring it is tightly fastened. Next, gently lift the Aprilaire 600 humidifier and align it with the bracket. Lower the unit onto the bracket and ensure it is properly seated. Tighten the retaining screws to hold the humidifier firmly in place. Double-check the unit’s levelness to ensure even water distribution. Finally, connect the water supply and electrical components as outlined in the manual. Following these steps ensures a stable and efficient installation. Always refer to the manual for specific details and safety guidelines.
Connecting the Water Supply
Connecting the water supply for the Aprilaire 600 humidifier is a straightforward process that requires careful attention to detail. First, locate the water supply line near your furnace or installation area. Install a saddle valve onto the water supply line to create a tap for the humidifier’s water connection. Follow the manufacturer’s instructions for the saddle valve installation to ensure it is securely attached and leak-free.
Next, attach the appropriate tubing to the saddle valve. Use the recommended type and size of tubing to connect it to the humidifier’s water inlet. Ensure all connections are tight and free from leaks by checking each joint. Turn off the water supply before making any connections to prevent unexpected water flow.
After connecting the tubing to both the saddle valve and the humidifier, turn the water supply back on. Inspect all connections for any signs of leakage. If you find any leaks, tighten the connections or replace any worn-out washers or gaskets as needed.
Finally, adjust the humidity level on the control to ensure optimal performance. Refer to the manual for specific instructions on setting the humidity level. Properly connecting the water supply is essential for the efficient operation of your Aprilaire 600 humidifier.
Electrical Connections and Setup
Proper electrical connections are critical for the smooth operation of your Aprilaire 600 humidifier. Begin by ensuring the power supply to your HVAC system is turned off to avoid any electrical hazards during installation. Locate the low-voltage terminal on your furnace or HVAC system, as this is where the humidifier’s control will connect.
Connect the wires from the Aprilaire 600 control to the appropriate terminals on the furnace. Ensure the wiring matches the manufacturer’s instructions, typically found in the installation manual. If your system requires a 24VAC relay, install it according to the instructions provided with the relay kit. This step is essential for models that do not have a built-in control.
Once the wiring is complete, restore power to the HVAC system and test the humidifier’s electrical setup. Use Setting C for Model 600 to ensure compatibility with your system. Proper electrical connections ensure efficient and safe operation, preventing potential malfunctions or damage to the unit.
Final Testing and Activation
After completing the installation, perform a thorough test to ensure the Aprilaire 600 operates correctly. Start by checking the water supply line for leaks and verifying that the drain is functioning properly. Turn on the HVAC system and set the humidifier to the desired humidity level using the control panel.
Monitor the unit to confirm it starts and runs smoothly. Check for any unusual noises or vibrations, which could indicate improper installation. Ensure the water panel is evenly moistened and that mist is distributed correctly through the ductwork. Adjust the humidistat setting if necessary to achieve the optimal moisture level in your home.
Finally, verify that the unit shuts off when the desired humidity level is reached. Refer to the installation manual for specific activation steps, such as setting the control to “C” for models 600 and 700. Proper activation ensures efficient and reliable performance of your Aprilaire 600 humidifier.
Maintenance and Upkeep
Regular maintenance ensures your Aprilaire 600 operates efficiently and effectively. Replace the water panel annually, clean the drain regularly, and follow the manual’s guidelines to prevent issues and maintain optimal performance.
Annual Maintenance Requirements
Annual maintenance is crucial for the optimal performance of your Aprilaire 600 humidifier. Replace the water panel every 12 months to ensure efficient evaporation and prevent mold buildup. Clean the drain and distribution tray regularly to maintain proper water flow. Inspect and replace worn-out parts, such as the humidifier pad, if necessary. Refer to the manual for specific instructions on how to access and replace components. Additionally, check the saddle valve for leaks and ensure it is free from obstructions. Proper maintenance not only extends the lifespan of the humidifier but also ensures clean and humidified air for your home. Always follow the manufacturer’s guidelines to avoid any potential issues and maintain warranty validity. Regular upkeep prevents mineral buildup and bacterial growth, ensuring your system runs smoothly year-round.
Replacing the Water Panel
To replace the water panel in your Aprilaire 600, start by turning off the power and water supply to the humidifier. Remove the cover by pressing the tabs and gently pulling it away. Locate the water panel, which is typically held in place by clips or screws. Carefully lift or slide the old panel out of the unit. Inspect the area for any debris or mineral buildup and clean it if necessary; Take the new water panel and align it with the guides or clips inside the humidifier. Secure it firmly to ensure proper fit and function. Once installed, replace the cover and restore the power and water supply. Check for leaks by running a test cycle. Replace the water panel annually or as recommended by the manufacturer to maintain efficiency and prevent mold growth. Proper disposal of the old panel is essential to avoid environmental harm. Regular replacement ensures optimal performance and clean humidified air throughout your home.
Drain Maintenance and Cleaning
Regular drain maintenance and cleaning are crucial for ensuring the Aprilaire 600 operates efficiently and prevents mold growth. Start by turning off the power and water supply to the humidifier. Locate the drain line and inspect it for any blockages or mineral buildup. Use a soft brush or a mixture of water and vinegar to clean the drain thoroughly. If you notice sediment or debris, flush the line with clean water to ensure proper flow. Check the drain trap for any obstructions and ensure it is securely connected to the humidifier. For optimal performance, clean the drain every 1-2 months, depending on usage. If you live in an area with hard water, more frequent cleaning may be necessary to remove mineral deposits. Proper drain maintenance prevents water backups and ensures the humidifier functions correctly. Always refer to the Aprilaire 600 installation manual for specific instructions tailored to your unit.
Troubleshooting Common Issues
Identify issues like water leaks or uneven humidity by checking error codes and ensuring proper installation. Verify water supply, electrical connections, and drain functionality. Refer to the manual for specific solutions or contact a professional if unresolved.
Identifying and Resolving Installation Errors
Common installation errors with the Aprilaire 600 include improper mounting, incorrect water supply connections, or misaligned distribution trays. Start by ensuring the unit is level and securely fastened to the wall or floor. If water leakage occurs, inspect the saddle valve and supply lines for tight connections. Verify that the water panel is correctly installed and the evaporative assembly is properly seated. Electrical issues may arise if the relay or wiring is not configured correctly, so cross-check the connections with the manual. If the humidifier fails to activate, check the control settings and ensure the bypass damper is fully open. Refer to the troubleshooting section of the manual for error code interpretations. If issues persist, consult a licensed HVAC technician to resolve complex problems and ensure system efficiency. Regular maintenance can prevent many installation-related errors, so schedule annual checks to keep the system running smoothly.
Understanding Error Codes
The Aprilaire 600 humidifier uses error codes to indicate specific issues during operation. These codes are essential for quick diagnosis and resolution. Common error codes include E1, E2, and E3. E1 typically signifies a water supply problem, such as low pressure or a closed saddle valve. E2 may indicate a sensor malfunction or improper calibration, while E3 could point to communication errors between components. To resolve these issues, refer to the manual for detailed explanations and troubleshooting steps. For E1, check the water supply lines for blockages or leaks. For E2, verify sensor connections and calibration. E3 may require resetting the system or checking wiring connections. Always consult the manual for specific instructions, as incorrect fixes can worsen the problem. If errors persist, contact a professional to ensure proper resolution and maintain system efficiency. Regular maintenance and adherence to installation guidelines can help minimize error occurrences.
When to Call a Professional
While the Aprilaire 600 humidifier is designed for DIY installation, certain situations require professional expertise. If you encounter complex wiring issues or improper water supply connections, consult a licensed technician. Additionally, if error codes persist despite troubleshooting, professional assistance is recommended. Issues like water damage or system malfunctions beyond basic maintenance should also be addressed by a professional. They can ensure compliance with safety standards and manufacturer guidelines, preventing further damage. Regular maintenance by a professional can also optimize performance and extend the lifespan of the unit. Always prioritize safety and efficiency by seeking expert help when needed. This ensures your Aprilaire 600 operates effectively and reliably, providing consistent humidity control for your home.

Additional Resources and Considerations
For comprehensive support, refer to the official Aprilaire website for manuals, FAQs, and troubleshooting guides. Environmental considerations and warranty details are also available, ensuring eco-friendly and compliant installation of your Aprilaire 600 humidifier.
Accessing the Full User Manual
The complete Aprilaire 600 user manual is readily available on the official Aprilaire website. It provides in-depth instructions for installation, operation, and maintenance. Users can download the PDF version, ensuring easy access to detailed diagrams and troubleshooting guides. The manual is organized into sections, covering pre-installation checks, step-by-step mounting, water supply connections, and electrical setups. It also includes annual maintenance schedules and error code explanations. Additionally, the manual offers environmental considerations and warranty information, helping users understand their responsibilities and benefits. By referring to this resource, homeowners and installers can ensure the humidifier operates efficiently and safely. Regular updates to the manual are posted online, so it’s advisable to check for the latest version before starting any installation or maintenance task. This comprehensive guide is essential for maximizing the performance and longevity of the Aprilaire 600 humidifier.
Warranty and Support Information
The Aprilaire 600 humidifier is backed by a comprehensive warranty program. The unit typically includes a 5-year warranty on parts and a 1-year warranty on labor, ensuring protection against defects in materials and workmanship. To activate the warranty, users must register their product within 60 days of installation. Detailed warranty terms and conditions can be found in the official Aprilaire 600 installation manual or on the manufacturer’s website. Additionally, Aprilaire offers dedicated customer support through their website, phone, or email. For troubleshooting or technical assistance, users can access online resources or contact authorized dealers. The warranty does not cover damages resulting from improper installation or failure to maintain the unit as per the manual’s guidelines. Regular maintenance, such as replacing the water panel annually, is essential to uphold warranty coverage and ensure optimal performance. For further inquiries, visit the Aprilaire support page or consult with a certified professional.
Frequently Asked Questions
Many users have common questions about the Aprilaire 600 installation process. One frequently asked question is about the correct setting for the humidifier control, with Setting C recommended for optimal performance. Another concern is the installation location, which should be on the supply side of the HVAC system to ensure even moisture distribution. Users also inquire about the water panel replacement frequency, which is typically every 12 months, depending on usage and water hardness. Additionally, some wonder if the unit can be installed on its side, but it’s advised to follow the vertical installation as per the manual. For troubleshooting, error codes like E1 or E2 indicate issues with water flow or sensor malfunctions. Lastly, users often ask about compatibility, and the Aprilaire 600 works with most standard HVAC systems. Always refer to the official manual or contact support for personalized assistance. Proper installation and maintenance ensure the humidifier operates efficiently and effectively.
Environmental Considerations
When installing and maintaining the Aprilaire 600 humidifier, consider its environmental impact. The unit is designed to conserve water by using a evaporative technology, which minimizes excess water usage; Additionally, the humidifier helps reduce energy consumption by maintaining consistent humidity levels, which can lower heating costs. Proper installation ensures minimal water waste, and regular maintenance, such as replacing the water panel annually, prevents mold growth and bacteria buildup. Dispose of the old water panel responsibly, as it may contain minerals and bacteria. Using a saddle valve for water supply connection is recommended to ensure a leak-free installation. Always follow local water treatment guidelines to avoid over-humidification, which can lead to moisture issues in your home. By adhering to these environmental considerations, you can enjoy a comfortable indoor climate while being eco-conscious. The Aprilaire 600 is an energy-efficient solution for humidity control, promoting sustainability and Eco-friendly home management.